

AI is evolving every single day. Website visitors expect immediate answers and efficient interaction. This is where an AI chatbot comes in. These conversational AI tools can answer user questions, provide support, and even guide them through the buying journey, all without human intervention. And what can be better than an AI chatbot on WordPress?
Considering the numerous benefits of chatbots, it’s no surprise that businesses are increasingly looking to integrate them into their websites. The good news? You don’t need extensive coding knowledge to leverage this powerful technology.
This blog post will guide you through the steps to create a free AI chatbot on a WordPress website.
Why Add an AI Chatbot on a WordPress Website?
Adding chatbot solutions to your WordPress website offers a multitude of advantages, including:
- 24/7 Customer Support: Chatbots never sleep! They can answer FAQs, address basic concerns, and provide initial troubleshooting, freeing the human support team to handle more complex issues.
- Effortless Customer Feedback Collection: Chatbots can initiate conversations, gather feedback from website visitors, and gauge user satisfaction. This valuable data allows you to improve your website and overall customer experience.
- Reduced Customer Support Emails: By providing immediate answers and resolving basic inquiries, chatbots can significantly reduce the number of customer support emails you receive, streamlining communication and saving you time.
- Boosted Conversions and Sales: Chatbots can answer product-related questions in real-time, guide users through the purchase process, and even offer personalized recommendations, increasing conversions and sales.
- Enhanced User Experience: An AI Chatbots on WordPress offers users an interactive way to get information quickly and easily. This personalized approach can significantly improve user experience and satisfaction.
An AI chatbot adds a helpful assistant to your website. It provides round-the-clock support and enhances a more engaging user experience.
Understanding the Building Blocks of Your AI Chatbot
Before diving into the creation process, let’s understand the two key components of an AI chatbot:
- User Interface (UI): This is the visual element that users interact with. It typically includes a chat window where users can type their questions and see the chatbot’s responses. The UI can also include buttons for predefined commands or frequently asked questions (FAQs).
- Backend: This is the brains behind the operation. It connects to a chosen AI API (Application Programming Interface) that processes user queries and generates responses using natural language processing (NLP) technology While standard sites use a unified setup, projects involving headless WordPress development often keep this backend logic separate from the frontend to allow the chatbot to function across multiple platforms or specialized interfaces.

Essentially, the user interacts with the UI, which sends the query to the backend, and the backend retrieves an AI-generated response that is displayed on the UI.
Step-by-Step Guide to Creating Your AI Chatbot on WordPress:
Here is the creation process for the AI chatbot on WordPress!
Step 1: Structure is Key (Already Explained):
We’ve already established that your chatbot consists of a UI (user interface) and a backend powered by an AI API. As we move forward, keep this structure in mind.

Step 2: Crafting the User Interface (UI):
The good news is you don’t need to design a UI from scratch. There are several free and downloadable UI templates available online that you can use directly. These pre-built UIs typically include elements like:
- Startup Message: A welcome message that greets users and introduces the chatbot.
- Chat Window: This is where users will type their questions and see the chatbot’s responses.
- Command Buttons (Optional): These buttons can offer quick access to frequently asked questions, product categories, or specific functionalities.
Step 3: Building the Backend with a WordPress Plugin:
The backend is where the magic happens! This is where your chatbot will connect to an AI API to generate responses.
Here’s how to set up the backend using a free WordPress plugin:
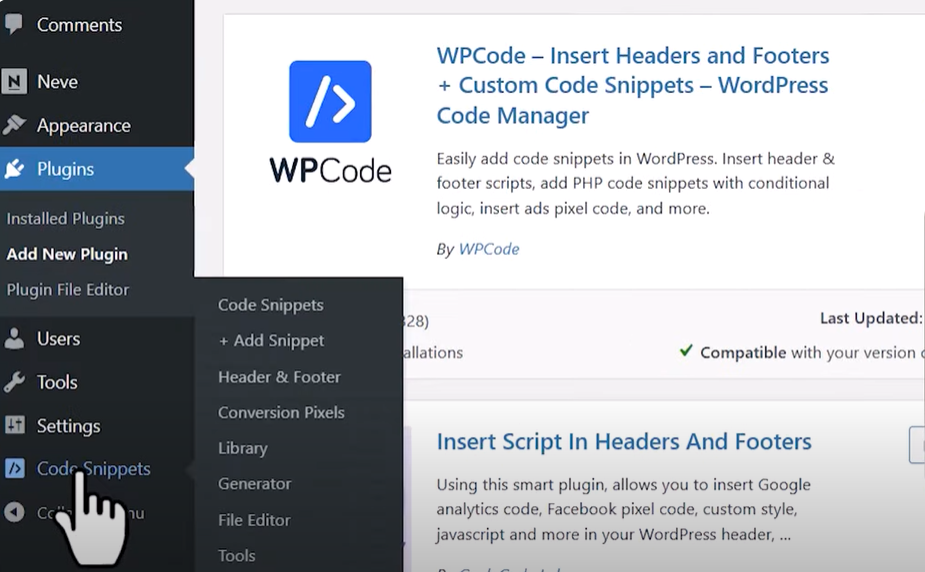
- Install the WP Code Snippets Plugin: This plugin lets you easily add custom code snippets to your WordPress website. You can find it for “WP Code Snippets” in the WordPress plugin directory.
- Downloadable Code Snippets: The chatbot backend will need downloadable code snippets.
These snippets will typically handle functionalities like:
- Connecting to the chosen AI API
- Processing user queries
- Generating AI responses based on the query
Please note: Downloading code snippets from untrusted sources can be risky. It’s recommended to consult a developer or use resources from reputable websites for these snippets.
Step 4: Connecting the UI and Backend:
Once you have your UI template and downloadable code snippets, it’s time to connect them. This process involves integrating the UI code which displays the chat window and buttons with the backend code snippets that handle AI interaction, ultimately powering your AI customer service solution.
The integration process will vary depending on the chosen UI template and code snippets. However, generally, you’ll need to:
Modify the UI code to include sections where the chatbot’s AI-generated responses will be displayed.
Edit the backend code snippets to specify where they should send the retrieved responses (likely to a designated element within the UI code).

Step 5: Publishing Your AI Chatbot on WordPress
Now that your UI and backend are connected, it’s time to unleash your chatbot on the world (well, at least your website visitors)! Here’s how to publish your chatbot on your WordPress website:
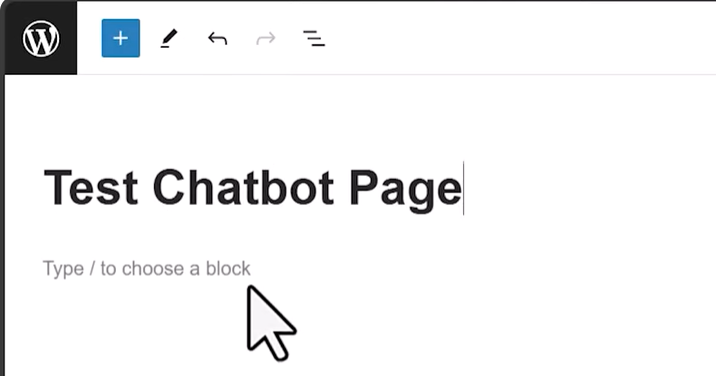
- Add a Custom HTML Block: Navigate to the WordPress page where you want your chatbot to appear. In the editing interface, add a new block and select “Custom HTML.”
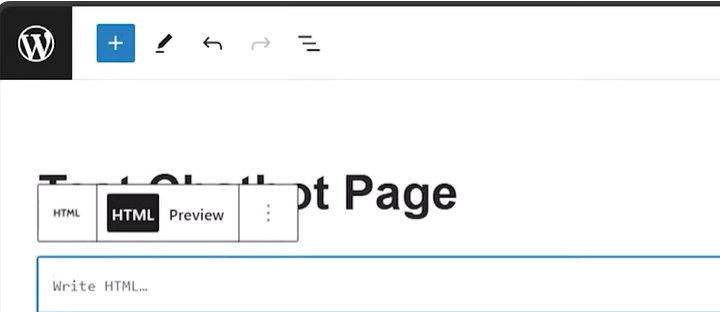
- Include Styling and Script Tags: Paste the code for both the UI and backend functionalities within the custom HTML block. Include styling and script tags to ensure your chatbot displays and functions correctly.

Here’s a general structure to follow within the custom HTML block:
<style>
</style>
<script>
</script>
Important Note: The specific code snippets and styling will vary depending on your chosen UI template and backend functionalities. Refer to the documentation or resources where you obtained these codes for detailed instructions.
Step 6: Testing and Refinement:
Once you’ve published the custom HTML block containing your chatbot code, it’s crucial to test it thoroughly. Ask colleagues, friends, or family members to interact with the chatbot and provide feedback.
This testing phase allows you to identify any errors in the code or areas where the chatbot responses might be unclear or irrelevant. Refine the UI and backend code to optimize the chatbot’s performance.

Wrap Up
You can create a free AI chatbot for your WordPress website by following these steps. While this blog post provides a general framework, remember that the specifics of creating your chatbot will depend on the chosen UI template, downloadable code snippets, and AI API. By incorporating an AI chatbot into your WordPress website services, you can provide visitors with 24/7 support and enhanced user experience.
